19. Examining the Point Cloud
Header Text
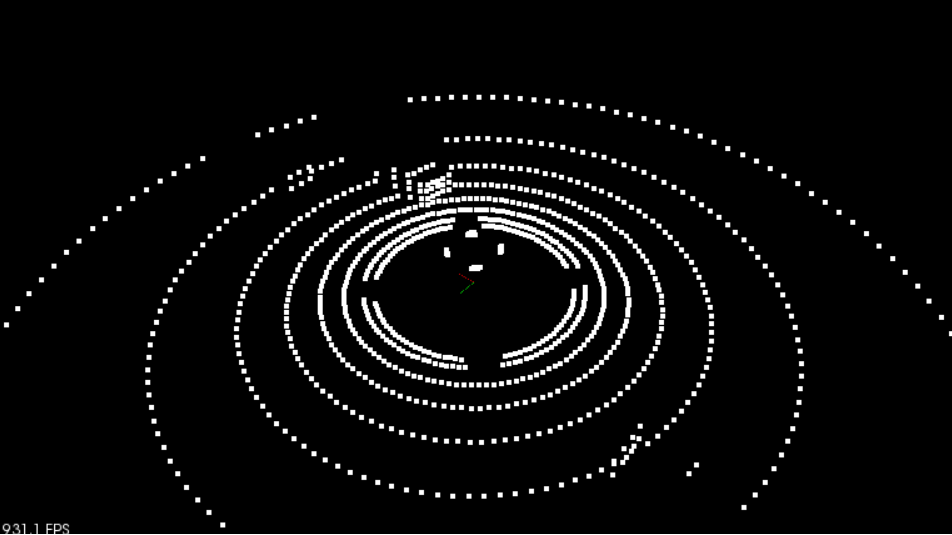
Examining the Point Cloud
ND313 C1 L1 A20 Examining The Point Cloud [LB]
Now that you can see what the lidar rays look like, what about the actual point cloud data that you will be using and processing? You can view the point cloud data using the
renderPointCloud
function in render. You can also choose to turn off the rendering for the highway scene so you can see what the point cloud looks like by itself.
The result in the image above is without noise and with lidar
minDistance
set to zero. With a high lidar
minDistance
, you can remove the points above that are hitting the roof of your car, since these won't help you detect other cars. Also, some noise variance helps to create more interesting looking point clouds. Additionally, adding noise will help you to develop more robust point processing functions.
Exercise
Now you will view the lidar's point cloud by itself, without the rays.
-
To do this, call
renderPointCloudinstead ofrenderRaysin thesimpleHighwayfunction. -
You can also view the point cloud without obstacles by setting
renderScenetofalseinenvironment.cpp.
When you are finished, your output should look like the image below.
Simulation Point Cloud Image
Simulated PCD
Workspace
This section contains either a workspace (it can be a Jupyter Notebook workspace or an online code editor work space, etc.) and it cannot be automatically downloaded to be generated here. Please access the classroom with your account and manually download the workspace to your local machine. Note that for some courses, Udacity upload the workspace files onto https://github.com/udacity , so you may be able to download them there.
Workspace Information:
- Default file path:
- Workspace type: react
- Opened files (when workspace is loaded): n/a
Solution
ND313 C1 L1 A21 Simulater PCD Solution